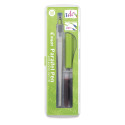
Modifying your parallel pen. Make it like a folded pen!
Some time ago, Parka and I did a video of modifying a parallel pen. Us, amateurs tried out grinding the pen nib with a Dremel and shaping it a certain way so that it would work like a folded pen. (http://www.parkablogs.com/content/how-not-grind-or-modify-your-pilot-parallel-pen) It took a lot of time and didn't work so great. So I've been tinkering and found a much quicker, simpler and better way to grind it. And you don't need complex tools. So forget what you saw in the video and try this instead:
You will need
1. A parallel pen. Size 3.8mm or 6mm
2. Coarse sandpaper
3. Micromesh or the finest sandpaper you can find.
Here is how I did it:
You will need
1. A parallel pen. Size 3.8mm or 6mm
2. Coarse sandpaper
3. Micromesh or the finest sandpaper you can find.
Here is how I did it:
The Parallel pen is a very good pen for calligraphy and drawing. However, it's not always easy to draw with it because of its 90 degree angles. You can get very thin lines and very thick lines. But achieving the many degrees of line widths in between is more challenging. After trying a folded pen from Tim's Pens (http://www.timspens.com/), I wished that my parallel pen could draw like that. A folded pen nib has a slant with makes drawing a lot easier. Angling the pen feels more natural and comfortable when you want to achieve line variation. And it is easier to produce all the various line widths between super fine and super thick.
So I got down to grinding my old parallel pen. First, notice the little round dimple on the nib? It appears only on one end. This actually keeps the two metal sheets of the nib separated so ink can flow through. So you MUST NOT cut this off. (Tina wrote in to me and pointed out that there is also a dimple on the other side but at the opposite corner. So yes, you would be shaving off the other dimple on the other side. It will still keep the metal sheets apart.) The mistake I made in the video with Parka is that I shaved both dimples, on both sides, off. That destroyed the gap.
This is how the parallel pen nib looks like from the top. It's two parallel metal sheets separated by dimples.
Next, I took the nib out. If it doesn't come out, use a cloth and rubber gloves and it will pull out easily.
I got pretty coarse sandpaper so I could wear the metal down quickly.
With that dimple on the top side, I started sanding the bottom side. It helps to put water on the sandpaper as you do it. It acts as a lubricant. I moved it forward and backward or side side to side, whatever works.
I achieved this slant on the nib. But I found that I had to hold the pen at a super low angle to draw with it. I needed a higher angle. Something closer to 45 degrees. So I kept at it.
I found that it was easier to just sand the nib when it was fitted in the pen. I held it at the angle I wanted and shaved more off.
Remember to add water. This only took maybe 5-10 minutes.
Then, I got this slant angle on the nib. Note that the dimple is still on top. Which means that the gap between the metal sheets is still preserved. And I didn't cut off the entire front tip too. You need it there. (Another mistake I made in the video). Thus, you should not do a slant on both sides of the nib.
With just sandpaper, you can try out these different shapes found in folded pens. But remember to keep the dimple and that bit at the front end.
After sanding, there will be dirt bits between the metal sheets. I used the film that comes with the Parallel pen and flossed all the bits out.
All done, I put some ink in the pen and tried out the writing angle and line variations. Nice. But the nib now had sharp edges. So I smoothed the nib using micromesh. Holding it with barely any pressure to the micromesh, I moved the nib in circles, figure eights, and in any direction that didn't feel so smooth.
Have ink in the pen when you do it. The ink will act as a lubricant. You can also add some water.
Do it very lightly. Very very lightly.
Then I was done! I put sumi ink in the pen and tried it out. You can put any ink in this pen. Sumi ink, however, lasted only 3 days before it clogged the pen. Still, no problem. I dismantled and washed everything out.
See the line variation it can produce now.
It's pretty much like a folded pen, except I don't have to dip it in ink. Nice!
This is with fountain ink. This pen will use lots of ink so you might not want to use your expensive inks. But that's up to you. I found that using it with a cartridge or convertor works better than using the pen as an eyedropper. As an eyedropper, it tends to leak (whether you modify it or not)
With this modification, I found it a lot more fun to draw with this pen. It was easier to control the line variation. And the degrees of line variation it can produce is amazing (depending on the shape you choose to grind it down to).
Ok that's it! Hope this helps. Have fun!
Parallel pens can be purchased here: Pilot Parallel Calligraphy Pen Set - 3.8 mm Pen Nib with Ink Cartridges


